Monday, 3 July 2017

Saturday, 1 July 2017
Hadoop Installation

INITIALLY YOU HAVE TO INSTALL JAVA HERE I HAVE GIVEN
lokesh@lenova-G500:~$ cd ~

# Update the source list
lokesh@lenova-G500:~$ sudo apt-get update

# The OpenJDK project is the default version of Java
# that is provided from a supported Ubuntu repository.
lokesh@lenova-G500:~$ sudo apt-get install default-jdk

lokesh@lenova-G500:~$ java -version
java version "1.7.0_65"
OpenJDK Runtime Environment (IcedTea 2.5.3) (7u71-2.5.3-0ubuntu0.14.04.1)
OpenJDK 64-Bit Server VM (build 24.65-b04, mixed mode)
CREATE A HADOOP GROUP
lokesh@lenova-G500:~$ sudo addgroup hadoop
Adding group `hadoop' (GID 1002) ...
Done.

lokesh@lenova-G500:~$ sudo adduser --ingroup hadoop lokesh
Adding user `hduser' ...
Adding new user `hduser' (1001) with group `hadoop' ...
Creating home directory `/home/lokesh' ...
Copying files from `/etc/skel' ...
Enter new UNIX password:
Retype new UNIX password:
passwd: password updated successfully
Changing the user information for hduser
Enter the new value, or press ENTER for the default
 Full Name []:
 Room Number []:
 Work Phone []:
 Home Phone []:
 Other []:
Is the information correct? [Y/n] Y
Installing SSH
ssh has two main components:- ssh : The command we use to connect to remote machines - the client.
- sshd : The daemon that is running on the server and allows clients to connect to the server.
lokesh@lenova-G500:~$ sudo apt-get install ssh
This will install ssh on our machine. If we get something similar to the following, we can think it is setup properly:
lokesh@lenova-G500:~$ which ssh
/usr/bin/ssh

lokesh@lenova-G500:~$ which sshd
/usr/sbin/sshd
Create and Setup SSH Certificates
Hadoop requires SSH access to manage its nodes, i.e. remote machines
plus our local machine. For our single-node setup of Hadoop, we
therefore need to configure SSH access to localhost.So, we need to have SSH up and running on our machine and configured it to allow SSH public key authentication.
Hadoop uses SSH (to access its nodes) which would normally require the user to enter a password. However, this requirement can be eliminated by creating and setting up SSH certificates using the following commands. If asked for a filename just leave it blank and press the enter key to continue.
lokesh@lenova-G500:~$ su hduser
Password:
lokesh@lenova-G500:~$ ssh-keygen -t rsa -P ""
Generating public/private rsa key pair.
Enter file in which to save the key (/home/lokesh/.ssh/id_rsa):
Created directory '/home/hduser/.ssh'.
Your identification has been saved in /home/lokesh/.ssh/id_rsa.
Your public key has been saved in /home/lokesh/.ssh/id_rsa.pub.
The key fingerprint is:
50:6b:f3:fc:0f:32:bf:30:79:c2:41:71:26:cc:7d:e3 lokesh@lenova-G500
The key's randomart image is:
+--[ RSA 2048]----+
|        .oo.o    |
|       . .o=. o  |
|      . + .  o . |
|       o =    E  |
|        S +      |
|         . +     |
|          O +    |
|           O o   |
|            o..  |
+-----------------+


lokesh@lenova-G500:/home/lokesh$ cat $HOME/.ssh/id_rsa.pub >> $HOME/.ssh/authorized_keys
The second command adds the newly created key to the list of authorized keys
so that Hadoop can use ssh without prompting for a password.
We can check if ssh works:
lokesh@lenova-G500:/home/k$ ssh localhost
The authenticity of host 'localhost (127.0.0.1)' can't be established.
ECDSA key fingerprint is e1:8b:a0:a5:75:ef:f4:b4:5e:a9:ed:be:64:be:5c:2f.
Are you sure you want to continue connecting (yes/no)? yes
Install Hadoop
lokesh@lenova-G500:~$ wget http://mirrors.sonic.net/apache/hadoop/common/hadoop-2.6.0/hadoop-2.6.0.tar.gz
lokesh@lenova-G500:~$ tar xvzf hadoop-2.6.0.tar.gz
We want to move the Hadoop installation to the /usr/local/hadoop directory using the following command:
lokesh@lenova-G500:~/hadoop-2.6.0$ su k
Password:

k@laptop:/home/hduser$ sudo adduser hduser sudo
[sudo] password for k:
Adding user `hduser' to group `sudo' ...
Adding user hduser to group sudo
Done.
lokesh@lenova-G500:/home/hduser$ sudo su hduser

lokesh@lenova-G500:~/hadoop-2.6.0$ sudo mv * /usr/local/hadoop
lokesh@lenova-G500:~/hadoop-2.6.0$ sudo chown -R hduser:hadoop /usr/local/hadoop
Setup Configuration Files
The following files will have to be modified to complete the Hadoop setup:- ~/.bashrc
- /usr/local/hadoop/etc/hadoop/hadoop-env.sh
- /usr/local/hadoop/etc/hadoop/core-site.xml
- /usr/local/hadoop/etc/hadoop/mapred-site.xml.template
- /usr/local/hadoop/etc/hadoop/hdfs-site.xml
Before editing the .bashrc file in our home directory, we need to find the path where Java has been installed to set the JAVA_HOME environment variable using the following command:
hduser@laptop update-alternatives --config java
There is only one alternative in link group java (providing /usr/bin/java): /usr/lib/jvm/java-7-openjdk-amd64/jre/bin/java
Nothing to configure.
Now we can append the following to the end of ~/.bashrc:
lokesh@lenova-G500:~$ vi ~/.bashrc

#HADOOP VARIABLES START
export JAVA_HOME=/usr/lib/jvm/java-7-openjdk-amd64
export HADOOP_INSTALL=/usr/local/hadoop
export PATH=$PATH:$HADOOP_INSTALL/bin
export PATH=$PATH:$HADOOP_INSTALL/sbin
export HADOOP_MAPRED_HOME=$HADOOP_INSTALL
export HADOOP_COMMON_HOME=$HADOOP_INSTALL
export HADOOP_HDFS_HOME=$HADOOP_INSTALL
export YARN_HOME=$HADOOP_INSTALL
export HADOOP_COMMON_LIB_NATIVE_DIR=$HADOOP_INSTALL/lib/native
export HADOOP_OPTS="-Djava.library.path=$HADOOP_INSTALL/lib"
#HADOOP VARIABLES END

lokesh@lenova-G500:~$ source ~/.bashrc
note that the JAVA_HOME should be set as the path just before the '.../bin/':
lokesh@lenova-G500-VirtualBox:~$ javac -version
javac 1.7.0_75

lokesh@lenova-G500-VirtualBox:~$ which javac
/usr/bin/javac

lokesh@lenova-G500-VirtualBox:~$ readlink -f /usr/bin/javac
/usr/lib/jvm/java-7-openjdk-amd64/bin/javac
We need to set JAVA_HOME by modifying hadoop-env.sh file.
lokesh@lenova-G500:~$ vi /usr/local/hadoop/etc/hadoop/hadoop-env.sh

export JAVA_HOME=/usr/lib/jvm/java-7-openjdk-amd64
Adding the above statement in the hadoop-env.sh file ensures that the value of JAVA_HOME variable will be available to Hadoop whenever it is started up.
3. /usr/local/hadoop/etc/hadoop/core-site.xml:
The /usr/local/hadoop/etc/hadoop/core-site.xml file contains configuration properties that Hadoop uses when starting up.
This file can be used to override the default settings that Hadoop starts with.
This file can be used to override the default settings that Hadoop starts with.
lokesh@lenova-G500:~$ sudo mkdir -p /app/hadoop/tmp
lokesh@lenova-G500:~$ sudo chown hduser:hadoop /app/hadoop/tmp
hduser@laptop:~$ vi /usr/local/hadoop/etc/hadoop/core-site.xml

<configuration>
 <property>
  <name>hadoop.tmp.dir</name>
  <value>/app/hadoop/tmp</value>
  <description>A base for other temporary directories.</description>
 </property>

 <property>
  <name>fs.default.name</name>
  <value>hdfs://localhost:54310</value>
  <description>The name of the default file system.  A URI whose
  scheme and authority determine the FileSystem implementation.  The
  uri's scheme determines the config property (fs.SCHEME.impl) naming
  the FileSystem implementation class.  The uri's authority is used to
  determine the host, port, etc. for a filesystem.</description>
 </property>
</configuration>
4. /usr/local/hadoop/etc/hadoop/mapred-site.xml
By default, the /usr/local/hadoop/etc/hadoop/ folder contains
/usr/local/hadoop/etc/hadoop/mapred-site.xml.template
file which has to be renamed/copied with the name mapred-site.xml
lokesh@lenova-G500:~$ cp /usr/local/hadoop/etc/hadoop/mapred-site.xml.template /usr/local/hadoop/etc/hadoop/mapred-site.xml
The mapred-site.xml file is used to specify which framework is being used for MapReduce.
We need to enter the following content in between the <configuration></configuration> tag:
<configuration>
 <property>
  <name>mapred.job.tracker</name>
  <value>localhost:54311</value>
  <description>The host and port that the MapReduce job tracker runs
  at.  If "local", then jobs are run in-process as a single map
  and reduce task.
  </description>
 </property>
</configuration>
5. /usr/local/hadoop/etc/hadoop/hdfs-site.xml
The /usr/local/hadoop/etc/hadoop/hdfs-site.xml file needs to be configured for each host in the cluster that is being used.
It is used to specify the directories which will be used as the namenode and the datanode on that host.
Before editing this file, we need to create two directories which will contain the namenode and the datanode for this Hadoop installation.
This can be done using the following commands:
lokesh@lenova-G500:~$ sudo mkdir -p /usr/local/hadoop_store/hdfs/namenode
lokesh@lenova-G500:~$ sudo mkdir -p /usr/local/hadoop_store/hdfs/datanode
lokesh@lenova-G500:~$ sudo chown -R hduser:hadoop /usr/local/hadoop_store
Open the file and enter the following content in between the <configuration></configuration> tag:
lokesh@lenova-G500:~$ vi /usr/local/hadoop/etc/hadoop/hdfs-site.xml

<configuration>
 <property>
  <name>dfs.replication</name>
  <value>1</value>
  <description>Default block replication.
  The actual number of replications can be specified when the file is created.
  The default is used if replication is not specified in create time.
  </description>
 </property>
 <property>
   <name>dfs.namenode.name.dir</name>
   <value>file:/usr/local/hadoop_store/hdfs/namenode</value>
 </property>
 <property>
   <name>dfs.datanode.data.dir</name>
   <value>file:/usr/local/hadoop_store/hdfs/datanode</value>
 </property>
</configuration>
Format the New Hadoop Filesystem
Now, the Hadoop file system needs to be formatted so that we can
start to use it. The format command should be issued with write
permission since it creates current directory under /usr/local/hadoop_store/hdfs/namenode folder:
lokesh@lenova-G500:~$ hadoop namenode -format
DEPRECATED: Use of this script to execute hdfs command is deprecated.
Instead use the hdfs command for it.
Starting Hadoop
Now it's time to start the newly installed single node cluster. We can use start-all.sh or (start-dfs.sh and start-yarn.sh)
lokesh@lenova-G500:~$ start-all.sh
This script is Deprecated. Instead use start-dfs.sh and start-yarn.sh
16/01/21 3:21:15 WARN util.NativeCodeLoader: Unable to load native-hadoop library for your platform... using builtin-java classes where applicable
Starting namenodes on [localhost]
localhost: starting namenode, logging to /usr/local/hadoop/logs/hadoop-lokesh-namenode-lenova-G500.out
localhost: starting datanode, logging to /usr/local/hadoop/logs/hadoop-hduser-datanode-laptop.out
Starting secondary namenodes [0.0.0.0]
0.0.0.0: starting secondarynamenode, logging to /usr/local/hadoop/logs/hadoop-lokesh-secondarynamenode-lenova-G500.out
16/01/21 3:21:15 WARN util.NativeCodeLoader: Unable to load native-hadoop library for your platform... using builtin-java classes where applicable
starting yarn daemons
starting resourcemanager, logging to /usr/local/hadoop/logs/yarn-lokesh-resourcemanager-lenova-G500.out
localhost: starting nodemanager, logging to /usr/local/hadoop/logs/yarn-hduser-nodemanager-lenova-G500.out
Friday, 25 March 2016

1 : installl r java package in r studio then rhdfs package
library("rJava", lib.loc="~/R/x86_64-pc-linux-gnu-library/3.2")
2 : before installing it set hadoop path to studio and start the hadoop by typing
start-all.sh
Sys.setenv(HADOOP_CMD="/usr/local/hadoop/bin/hadoop")
Sys.setenv(HADOOP_HOME="/usr/local/hadoop")
library("rhdfs", lib.loc="~/R/x86_64-pc-linux-gnu-library/3.2")


3 : then import the data by using the command
reder=hdfs.line.reader("/data/diabetes1")
diabetes = reder$read()
typeof(diabetes)
diabetes


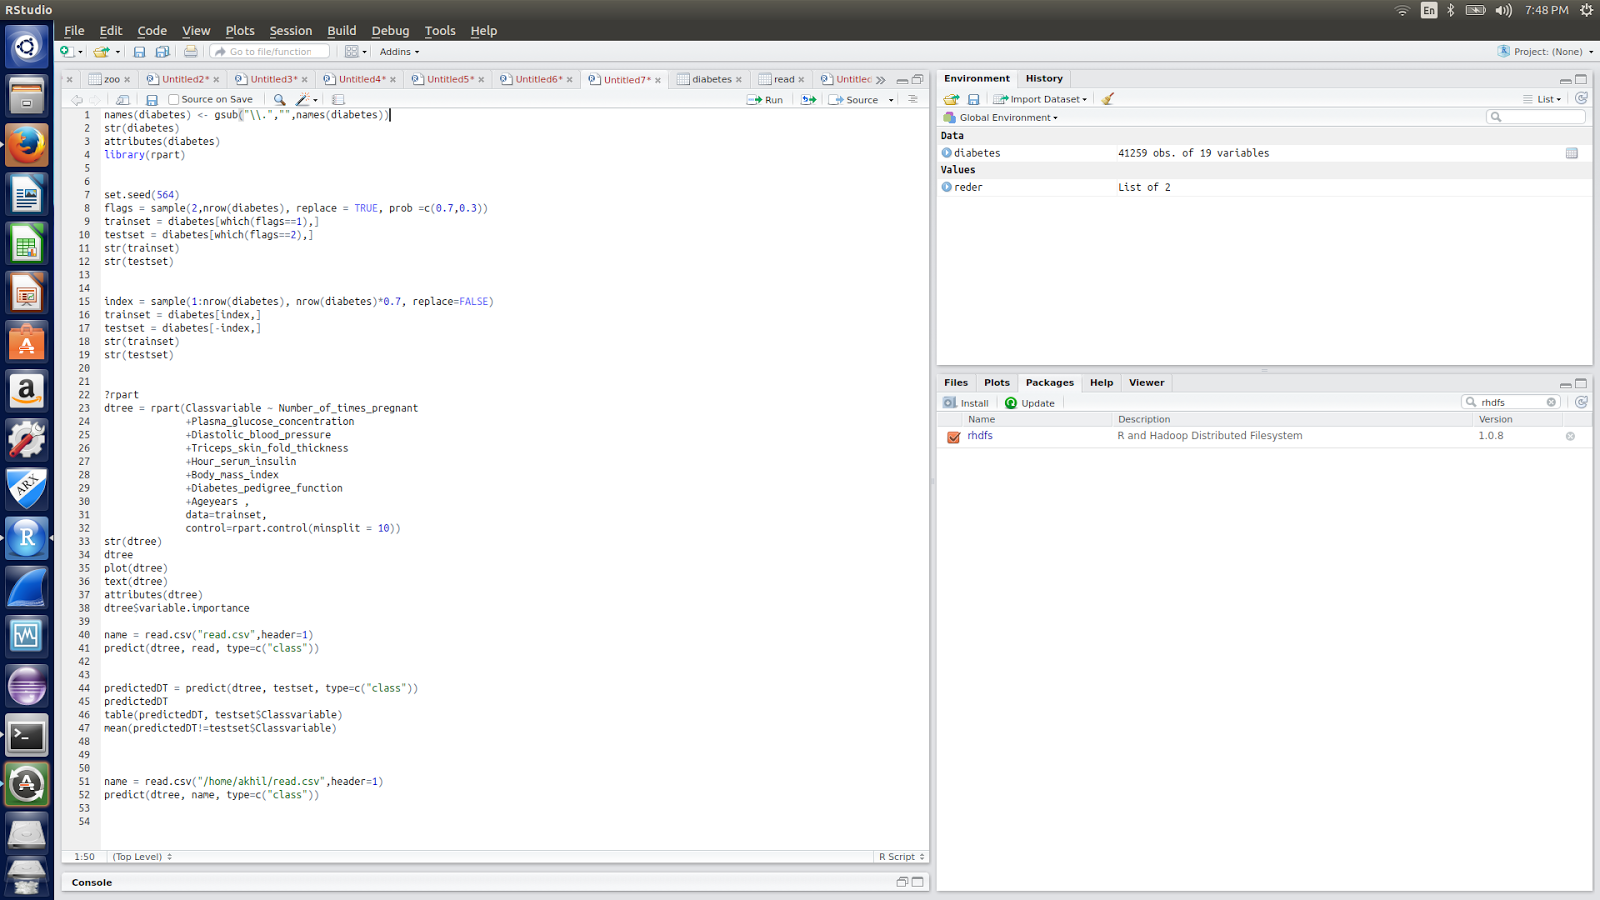
4 : now implement the decesion tree by using rpart package
names(diabetes) <- gsub("\\.","",names(diabetes))
str(diabetes)
attributes(diabetes)
library(rpart)
set.seed(564)
flags = sample(2,nrow(diabetes), replace = TRUE, prob =c(0.7,0.3))
trainset = diabetes[which(flags==1),]
testset = diabetes[which(flags==2),]
str(trainset)
str(testset)
index = sample(1:nrow(diabetes), nrow(diabetes)*0.7, replace=FALSE)
trainset = diabetes[index,]
testset = diabetes[-index,]
str(trainset)
str(testset)
?rpart
dtree = rpart(Classvariable ~ Number_of_times_pregnant
+Plasma_glucose_concentration
+Diastolic_blood_pressure
+Triceps_skin_fold_thickness
+Hour_serum_insulin
+Body_mass_index
+Diabetes_pedigree_function
+Ageyears ,
data=trainset,
control=rpart.control(minsplit = 10))
str(dtree)
dtree
plot(dtree)
text(dtree)


5 : now the mining results is accessed by decesion maker

Tools and softwares used in this project have listed below
The software is able to handle very large datasets on commodity hardware and features an intuitive cross-platform graphical user interface.

DOWNLOAD LINK:ARX
R STUDIO
R Studio is a free and open-source integrated development environment(IDE) for R, a is a language and environment for statistical computing and graphics. It is a GNU project which is similar to the S language and environment which was developed at Bell Laboratories (formerly AT&T, now Lucent Technologies) by John Chambers and colleagues. R can be considered as a different implementation of S. There are some important differences, but much code written for S runs unaltered under R.
R provides a wide variety of statistical (linear and nonlinear modelling, classical statistical tests, time-series analysis, classification, clustering, …) and graphical techniques, and is highly extensible. The S language is often the vehicle of choice for research in statistical methodology, and R provides an Open Source route to participation in that activity.

DOWNLOAD LINK FOR R : R
DOWNLOAD LINK FOR R STUDIO : R Studio
ECLLIPSE
Eclipse provides IDEs and platforms nearly every language and architecture. We are famous for our Java IDE, C/C++, JavaScript and PHP IDEs built on extensible platforms for creating desktop, Web and cloud IDEs. These platforms deliver the most extensive collection of add-on tools avaialable for software developers.

DOWNLOAD LINK : ECLLIPSE
APACHE HADOOP
The Apache Hadoop software library is a framework that allows for the distributed processing of large data sets across clusters of computers using simple programming models. It is designed to scale up from single servers to thousands of machines, each offering local computation and storage. Rather than rely on hardware to deliver high-availability, the library itself is designed to detect and handle failures at the application layer, so delivering a highly-available service on top of a cluster of computers, each of which may be prone to failures.

DOWNLOAD LINK : HADOOP
SELENIUM
Selenium is a portable software testing framework for web applications. Selenium provides a record/playback tool for authoring tests without learning a test scripting language (Selenium IDE).
The Selenium Server is needed in order to run either Selenium RC style scripts or Remote Selenium WebDriver ones. The 2.x server is a drop-in replacement for the old Selenium RC server and is designed to be backwards compatible with your existing infrastructure.

DOWNLOAD LINK : SELENIUM JAR
WIRESHARK
Wireshark is a free and open packet analyzer. It is used for network troubleshooting, analysis, software and communication protocal development, and education.
Wireshark is the world's foremost network protocol analyzer. It lets you see what's happening on your network at a microscopic level. It is the de facto (and often de jure) standard across many industries and educational institutions.
Wireshark development thrives thanks to the contributions of networking experts across the globe. It is the continuation of a project that started in 1998

DOWNLOAD LINK : WIRESHARK
VIRTUAL BOX
VirtualBox is a powerful x86 and AMD64/Intel64 virtulization product for enterprise as well as home use. Not only is VirtualBox an extremely feature rich, high performance product for enterprise customers, it is also the only professional solution that is freely available as Open Source Software

DOWNLOAD LINK : VIRTUAL BOX
XAMPP
XAMPP is a completely free, easy to install Apache distribution containing MariaDB, PHP, and Perl. The XAMPP open source package has been set up to be incredibly easy to install and to use.

DOWNLOAD LINK : XAMPP
Thursday, 24 March 2016

HADOOP SETUP CODE
HDFS-SITE.XML
<configuration>
<property>
<name>dfs.replication</name>
<value>1</value>
<description>Default block replication.
The actual number of replications can be specified when the file is created.
The default is used if replication is not specified in create time.
</description>
</property>
<property>
<name>dfs.namenode.name.dir</name>
<value>file:/usr/local/hadoop_store/hdfs/namenode</value>
</property>
<property>
<name>dfs.datanode.data.dir</name>
<value>file:/usr/local/hadoop_store/hdfs/datanode</value>
</property>
</configuration>
CORE_SITE.XML
<configuration>
<property>
<name>hadoop.tmp.dir</name>
<value>/app/hadoop/tmp</value>
<description>A base for other temporary directories.</description>
</property>
<property>
<name>fs.default.name</name>
<value>hdfs://localhost:54310</value>
<description>The name of the default file system.</description>
</property>
</configuration>
MAPRED-SITE.XML
<configuration>
<property>
<name>mapred.job.tracker</name>
<value>localhost:54311</value>
<description>The host and port that the MapReduce job tracker runs
at.
</description>
</property>
</configuration>
IMPORTING DATA FROM HDFS
reder=hdfs.line.reader("/data/diabetes")
dibaetes = reder$read()
typeof(dibaetes)
diabetes
DECESION TREE USING R
names(diabetes) <- gsub("\\.","",names(diabetes))
str(diabetes)
attributes(diabetes)
library(rpart)
set.seed(564)
flags = sample(2,nrow(diabetes), replace = TRUE, prob =c(0.7,0.3))
trainset = diabetes[which(flags==1),]
testset = diabetes[which(flags==2),]
str(trainset)
str(testset)
index = sample(1:nrow(diabetes), nrow(diabetes)*0.7, replace=FALSE)
trainset = diabetes[index,]
testset = diabetes[-index,]
str(trainset)
str(testset)
?rpart
dtree = rpart(Classvariable ~ Number_of_times_pregnant
+Plasma_glucose_concentration
+Diastolic_blood_pressure
+Triceps_skin_fold_thickness
+Hour_serum_insulin
+Body_mass_index
+Diabetes_pedigree_function
+Ageyears ,
data=trainset,
control=rpart.control(minsplit = 10))
str(dtree)
dtree
plot(dtree)
text(dtree)
attributes(dtree)
dtree$variable.importance
name = read.csv("new.csv",header=1)
predict(dtree, New, type=c("class"))
predictedDT = predict(dtree, testset, type=c("class"))
predictedDT
table(predictedDT, testset$Classvariable)
mean(predictedDT!=testset$Classvariable)
name = read.csv("read.csv",header=1)
predict(dtree, name, type=c("class"))
TESTING
package com.selenium.one;
import org.junit.Test;
import org.openqa.selenium.By;
import org.openqa.selenium.WebDriver;
import org.openqa.selenium.firefox.FirefoxDriver;
import com.relevantcodes.extentreports.ExtentReports;
import com.relevantcodes.extentreports.LogStatus;
public class Examples {
@Test
public void verifyTitle(){
ExtentReports extent = ExtentReports.get(Examples.class);
extent.init("/home/akhil/check.html",true);
extent.startTest("verify page");
/**
* @param args
*/
// TODO Auto-generated method stub
WebDriver driver =new FirefoxDriver();
driver.get("http://localhost/registration/input.html");
driver.manage().window().maximize();
extent.log(LogStatus.INFO,"browser is running");
driver.findElement(By.xpath("html/body/form/fieldset[1]/p/input")).sendKeys("lokesh@gmail.com");
extent.log(LogStatus.INFO,"browser is running");
driver.findElement(By.xpath("html/body/form/fieldset[2]/p[1]/input")).sendKeys("lokesh");
extent.log(LogStatus.INFO,"browser is running");
driver.findElement(By.xpath("html/body/form/fieldset[2]/p[2]/input")).sendKeys("kuncham");
extent.log(LogStatus.INFO,"browser is running");
driver.findElement(By.xpath("html/body/form/fieldset[2]/p[3]/input")).sendKeys("rvr");
extent.log(LogStatus.INFO,"browser is running");
driver.findElement(By.xpath("html/body/form/fieldset[2]/p[4]/input")).sendKeys("21");
extent.log(LogStatus.INFO,"browser is running");
driver.findElement(By.xpath("html/body/form/fieldset[2]/p[5]/input")).sendKeys("amarvathi");
extent.log(LogStatus.INFO,"browser is running");
driver.findElement(By.xpath("html/body/form/fieldset[2]/p[6]/input")).sendKeys("guntur");
extent.log(LogStatus.INFO,"browser is running");
driver.findElement(By.xpath("html/body/form/fieldset[2]/p[7]/input")).sendKeys("andhra pradesh");
extent.log(LogStatus.INFO,"browser is running");
driver.findElement(By.xpath("html/body/form/fieldset[2]/p[8]/input")).sendKeys("522007");
extent.log(LogStatus.INFO,"browser is running");
driver.findElement(By.xpath("html/body/form/fieldset[2]/p[9]/input")).sendKeys("87654");
extent.log(LogStatus.INFO,"browser is running");
driver.findElement(By.xpath("html/body/form/fieldset[2]/p[10]/input")).sendKeys("12345");
extent.log(LogStatus.INFO,"browser is running");
driver.findElement(By.xpath("html/body/form/fieldset[3]/p[1]/input")).sendKeys("22");
extent.log(LogStatus.INFO,"browser is running");
driver.findElement(By.xpath("html/body/form/fieldset[3]/p[2]/input")).sendKeys("24");
extent.log(LogStatus.INFO,"browser is running");
driver.findElement(By.xpath("html/body/form/fieldset[3]/p[3]/input")).sendKeys("54");
extent.log(LogStatus.INFO,"browser is running");
driver.findElement(By.xpath("html/body/form/fieldset[3]/p[4]/input")).sendKeys("44");
extent.log(LogStatus.INFO,"browser is running");
driver.findElement(By.xpath("html/body/form/fieldset[3]/p[5]/input")).sendKeys("66");
extent.log(LogStatus.INFO,"browser is running");
driver.findElement(By.xpath("html/body/form/fieldset[3]/p[6]/input")).sendKeys("89");
extent.log(LogStatus.INFO,"browser is running");
driver.findElement(By.xpath("html/body/form/fieldset[3]/p[7]/input")).sendKeys("56");
extent.log(LogStatus.INFO,"browser is running");
driver.findElement(By.xpath("html/body/form/fieldset[3]/input")).click();
extent.log(LogStatus.PASS, "submitted sucessfully");
driver.navigate().back();
}
}
Friday, 30 September 2011
Subscribe to:
Posts (Atom)